DIY Skee Ball Machine - Building Your Own Arcade Classic
The skee ball machine is fantastic. The mere act of rolling a ball into a target is insanely satisfying. While skee ball machines are commonly found in arcades and amusement parks, building your own DIY skee ball machine can be a fun and rewarding project that brings the excitement of the game right into your home.
Author:Buttskin FamilyReviewer:Caden SteelheartAug 16, 20231.4K Shares134.2K Views
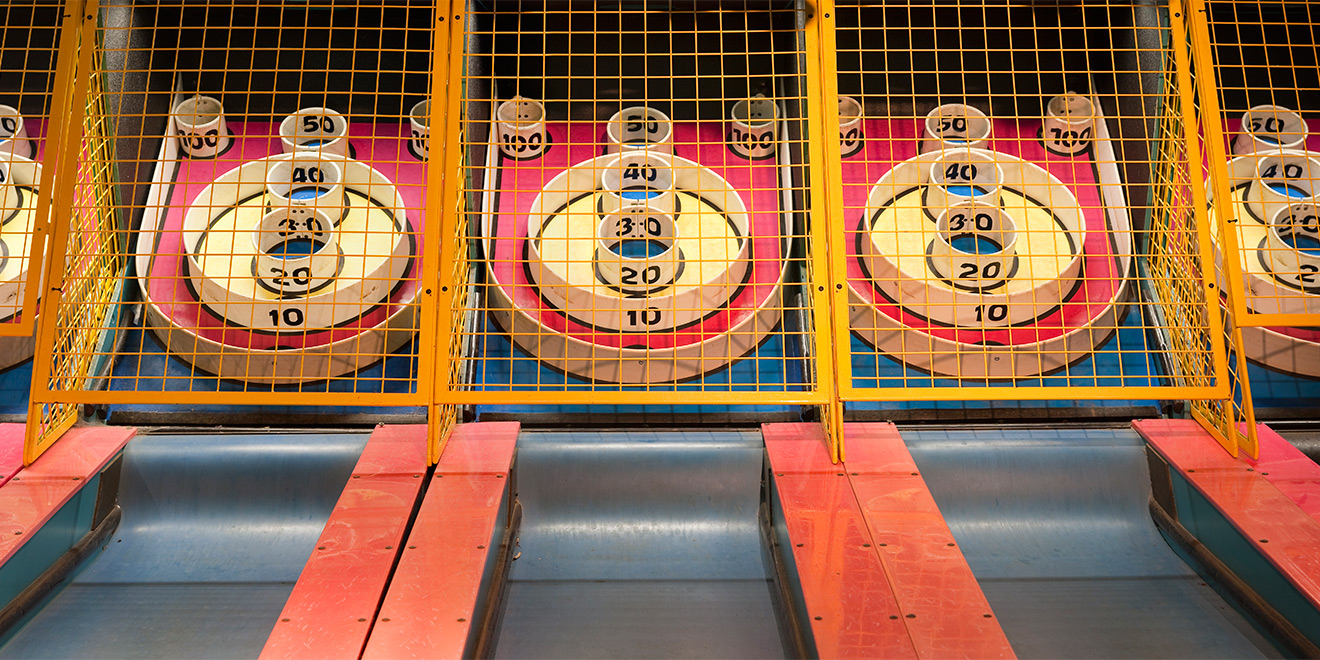
The skee ball machine is fantastic. The mere act of rolling a ball into a target is insanely satisfying. While skee ball machines are commonly found in arcades and amusement parks, building your own DIY skee ball machinecan be a fun and rewarding project that brings the excitement of the game right into your home.
Skee ball machines can be built almost entirely out of three-quarter-inch plywood. These sheets can be cut out using a ShopBot CNC machine and screwed together in a tab-and-slot construction method. The playfield can be covered with cork for a real Skeeball experience.
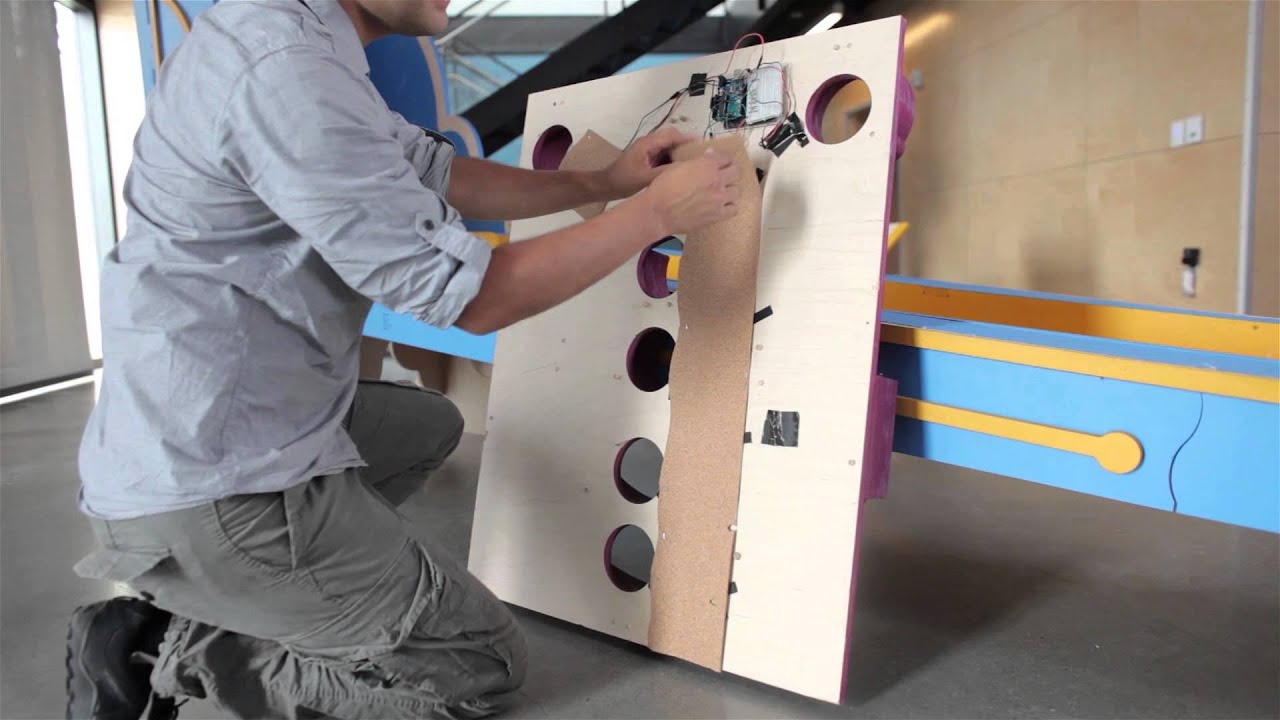
The electronics for this construction are quite simple, consisting of only a few IR distance sensors installed beneath the holes.
In this guide, we will delve into the step-by-step process of creating a DIY skee ball machine, including the materials needed, the construction process, and some tips for customization.
Materials Needed
Building a DIY skee ball machine is an exciting and rewarding project that allows you to bring the fun of this classic arcade game right into your home.
To successfully construct your own skee ball machine, it's essential to gather the necessary materials. This guide will detail the various materials needed for each component of the machine, including the base, ball ramp, target holes, ball tracks, and the scoring system.
Base Materials
The base serves as the foundation for your DIY skee ball machine, providing stability and support for the entire structure. For the base, you will need the following materials:
- Plywood or MDF (Medium-Density Fiberboard) -Choose a sturdy and high-quality plywood or MDF board to create the base. The thickness of the board will depend on the size and design of your skee ball machine.
- Wood Screws - Use wood screws to securely attach the various components of the base together. Make sure to select screws of appropriate length to avoid damaging the surface.
- Wood Glue - Apply wood glue along the joints before screwing the pieces together to add extra strength and stability to the base.
Ball Ramp Materials
The ball ramp is a critical element of the skee ball machine, providing the incline that allows the balls to roll towards the target holes. For the ball ramp, you will need the following materials:
- Wooden Dowels - Wooden dowels will form the sides of the ball ramp, guiding the balls along the path. Choose dowels of suitable thickness and length to match your design.
- Plywood or MDF -Use plywood or MDF to create the surface of the ball ramp. It should be smooth to facilitate easy ball rolling.
- Wood Screws and Wood Glue -Secure the wooden dowels to the ramp's surface using wood screws and wood glue to ensure a sturdy and reliable ball path.
Target Hole Materials
The target holes are the scoring areas where the balls land to accumulate points. To construct the target holes, you will need the following materials:
- Wooden Dowels - Wooden dowels will be used to form the rims of the target holes. Choose dowels of different diameters to create holes with various point values.
- Plywood or MDF -The base around the target holes should be made of plywood or MDF to provide a stable surface for the dowels.
- Wood Screws and Wood Glue -Secure the wooden dowels to the base using wood screws and wood glue to create durable and functional target holes.
Ball Track Materials
The ball tracks guide the balls from the starting point to the target holes. For the ball tracks, you will need the following materials:
- Ball Bearings -Ball bearings provide a smooth surface for the balls to roll on. Install them along the ball tracks to ensure effortless movement.
- Plywood or MDF - Create the tracks using plywood or MDF, ensuring they are straight and aligned to prevent any disruptions during play.
Scoring System Materials
Implementing a scoring system adds to the excitement of your DIY skee ball machine. Depending on your preference, you can use simple or more complex methods. For the scoring system, you may need the following materials:
- Pen and Paper - For a basic scoring system, use pen and paper to record the points scored when the balls land in the target holes.
- Electronics (Optional) - If you prefer a more advanced scoring system, consider using electronic sensors and displays. This may require additional components like sensors, microcontrollers, LEDs, and wiring.
Construction Process
Building a DIY skee ball machine is a rewarding and enjoyable project that allows you to create a fun arcade game right in your home. The construction process involves several key steps, each contributing to the final design and functionality of the machine.
In this guide, we will break down the construction process into detailed headings, guiding you through the creation of the base, ball ramp, target holes, ball tracks, scoring system, and finishing touches of your DIY skee ball machine.
Design And Planning
Before you start building your DIY skee ball machine, it's essential to plan and design the layout. Consider the space you have available and decide on the dimensions of the machine.
Sketch out the layout, including the ball ramp's length and angle, the arrangement of target holes, and the positioning of the scoring system. Planning ahead will help ensure that you have all the necessary materials and a clear vision of your project.
Building The Base
The base forms the foundation of your DIY skee ball machine, providing stability and support for the entire structure. To build the base, follow these steps:
- Cut the Plywood or MDF - Use a saw to cut the plywood or MDF into the desired shape and size for the base. Make sure it is level and sturdy.
- Assembling the Base -Securely attach the pieces of plywood or MDF using wood screws and wood glue. Ensure that the corners are properly aligned and reinforced for stability.
Constructing The Ball Ramp
The ball ramp is a crucial component that allows the balls to roll smoothly towards the target holes. Follow these steps to build the ball ramp:
- Designing the Ball Ramp -Determine the length and angle of the ball ramp based on your layout and available space. Sketch out the design, considering the smoothness and gradual incline needed for smooth ball movement.
- Building the Ball Ramp -Cut wooden dowels to form the sides of the ball ramp. Attach them to the plywood or MDF surface using wood screws and wood glue. Ensure the ball ramp is securely fixed to the base.
Creating The Target Holes
The target holes are where the balls land to accumulate points. To create the target holes, follow these steps:
- Drilling the Holes -Use a drill to create holes in the base where the target holes will be positioned. Select wooden dowels of different diameters to form the rims of the target holes.
- Assembling the Target Holes - Securely attach the wooden dowels to the base using wood screws and wood glue. Ensure that the target holes are evenly spaced and aligned.
Installing The Ball Tracks
The ball tracks guide the balls from the starting point to the target holes. Follow these steps to install the ball tracks:
- Designing the Ball Tracks - Plan the layout and path of the ball tracks, ensuring they are straight and aligned with the target holes.
- Installing the Ball Bearings -Place ball bearings along the ball tracks to create a smooth surface for the balls to roll on. Secure the ball bearings in place using wood glue.
Implementing The Scoring System:
The scoring system adds an exciting element to your DIY skee ball machine. Depending on your preference, you can use a simple or more advanced scoring system:
- Basic Scoring - For a basic scoring system, use pen and paper to record the points scored when the balls land in the target holes.
- Advanced Scoring (Optional) -For a more sophisticated scoring system, consider using electronic sensors and displays. This may involve additional components like sensors, microcontrollers, LEDs, and wiring.
Finishing Touches
Once the main components of your DIY skee ball machine are assembled, add finishing touches to enhance its appearance and functionality:
- Sanding and Smoothing -Use sandpaper to smooth any rough edges or surfaces, giving your machine a polished look.
- Painting and Varnishing - Apply paint and varnish to customize the appearance of your skee ball machine and protect the wood from wear and tear.
- Customization - Add decals, stickers, or custom graphics to give your machine a unique and personalized touch.
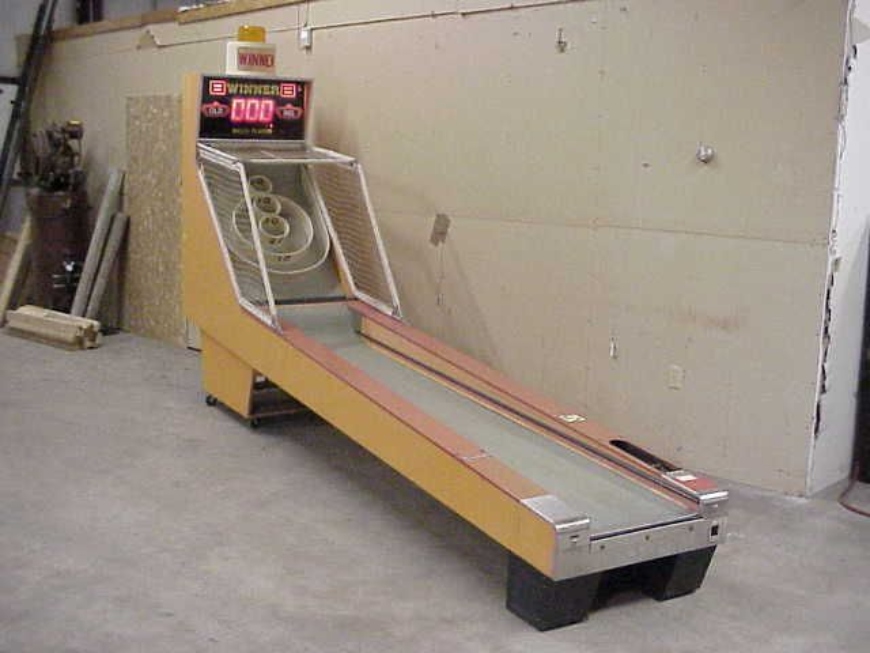
DIY Skee Ball Machine
Tips For Customization
- LED Lighting -Incorporate LED lighting into the target holes or around the ball tracks to enhance the visual appeal of your DIY skee ball machine.
- Personalized Graphics - Add decals, stickers, or custom graphics to give your machine a unique and personalized touch.
- Size and Portability -Consider the size of your DIY skee ball machine and whether you want it to be a permanent fixture or something that can be easily moved and stored when not in use.
- Multi-Player Option -If you have the space and resources, you can design your DIY skee ball machine to accommodate multiple players for friendly competitions and family fun.
Safety Considerations
When building your DIY skee ball machine, prioritize safety. Ensure that all components are securely fastened, and there are no sharp edges or potential hazards that could cause injury. If you plan to include electronic components in the scoring system, follow proper electrical safety guidelines and consider using low-voltage options for added safety.
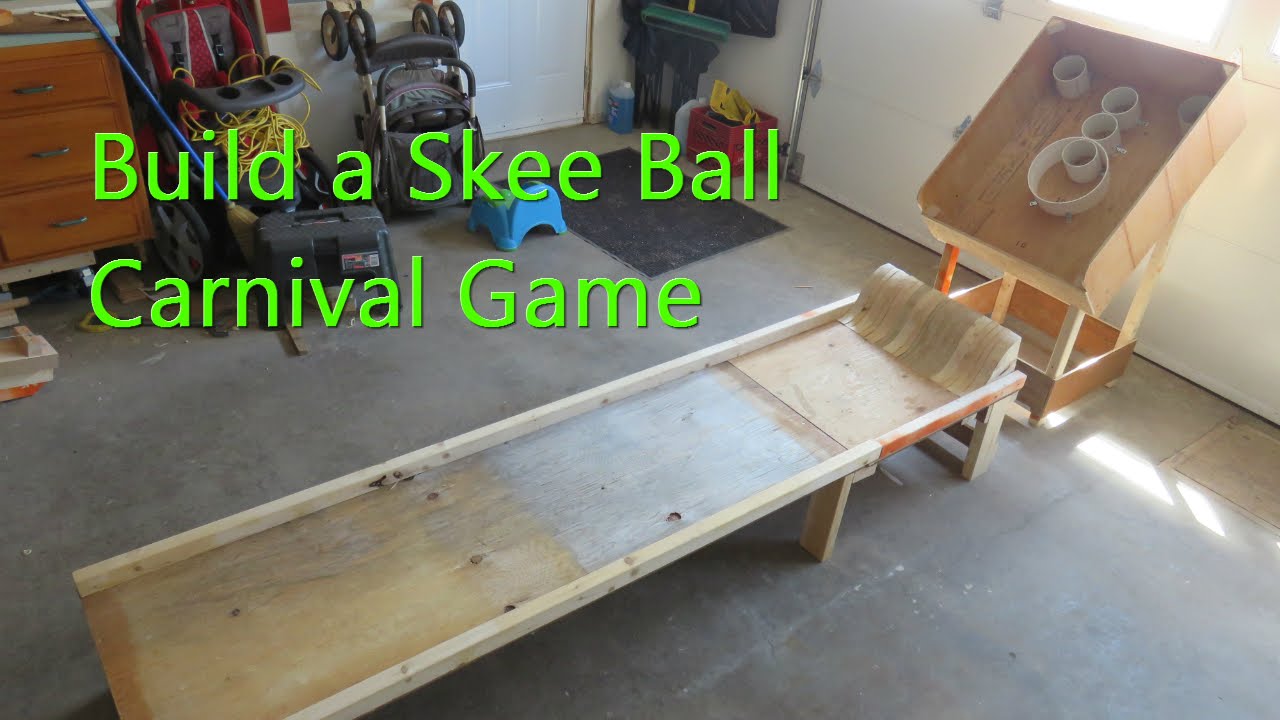
How to Build a Skee Ball Game
People Also Ask
How Do I Build A DIY Skee Ball Machine?
To build a DIY skee ball machine, you will need materials like plywood, wooden dowels, ball bearings, wood screws, and wood glue. Start by designing the layout, constructing the base, building the ball ramp and target holes, creating ball tracks, implementing a scoring system, and adding finishing touches for a polished look.
What Are The Materials Required For A DIY Skee Ball Machine?
The materials needed for a DIY skee ball machine include plywood or MDF, wooden dowels, ball bearings, wood screws, wood glue, nails, sandpaper, paint, and varnish. These components are essential for constructing the base, ball ramp, target holes, and ball tracks.
Can I Customize My DIY Skee Ball Machine?
Yes, you can customize your DIY skee ball machine to suit your preferences. Consider adding LED lighting, personalized graphics, or designing it for multi-player options. Additionally, you can think about its size and portability to fit your space and storage needs.
Is Building A DIY Skee Ball Machine Safe?
Safety is essential when building a DIY skee ball machine. Make sure all components are securely fastened, and there are no sharp edges or potential hazards that could cause injury. Follow proper electrical safety guidelines if incorporating electronic components for scoring systems.
What Is The Difficulty Level Of Building A DIY Skee Ball Machine?
Building a DIY skee ball machine requires intermediate to advanced woodworking skills. The process involves designing the layout, cutting and assembling the components, and creating a smooth ball ramp and target holes. However, with careful planning and attention to detail, enthusiasts can successfully complete the project.
Conclusion
Building your own DIY skee ball machine can be a rewarding and enjoyable project, allowing you to bring the excitement of the arcade classic right into your home.
By following a well-thought-out design and using quality materials, you can create a sturdy and functional skee ball machine that provides hours of entertainmentfor friends and family. With some creativity and customization, you can make your DIY skee ball machine a true centerpiece for fun and memorable moments.

Buttskin Family
Author
The Buttskins are a crazy author family who love writing, laughter, and eating an unhealthy amount of junk food. Mom Rockita started scribbling stories as soon as she could hold a pen, and Dad John didn't realize authoring children's books was a real job until after they were married.
Their kids have embraced storytelling at an early age. Little Lucy, age 5, dictates her colorful tales about dragons and princesses to her parents. Her 8-year old brother Jake collects scraps of paper to diagram his latest imaginary adventure involving ninjas and dinosaurs.

Caden Steelheart
Reviewer
Caden Steelheart, an enigmatic author, weaves tales that immerse readers in the depths of sin city's underbelly. With his words as a weapon, he crafts literary masterpieces that reflect the dark and dangerous spirit of the city. Caden's writing captures the gritty essence of sin city, delving into the intricacies of its characters and the moral complexities that define their existence.
Born amidst the shadows, Caden draws inspiration from the relentless chaos and unforgiving nature of the city. His words carry the weight of experience, creating a vivid and haunting portrayal of sin city's undercurrents. Through his stories, he explores the blurred lines between right and wrong, exploring themes of power, deception, and redemption.
Caden Steelheart's literary prowess has made him a name whispered in literary circles, captivating readers with his ability to immerse them in sin city's intricately woven tapestry. With each written word, he invites readers to journey into the darker realms of the human experience, offering them a glimpse into the secrets and sins that shape the city's inhabitants. Caden Steelheart, a master of capturing the essence of sin city through his writing, continues to captivate audiences with his haunting and evocative narratives.
Latest Articles
Popular Articles